

Turning Plates into Pictures: My Approach to Food Photography
Before I even walk into a food shoot, the planning starts long before I show up with my camera. If I can, I like to meet the client in person first. It gives me a chance to check out the restaurant, scout the lighting, see the layout, and get a feel for where I’d prefer to set up.
Walking into a food shoot is always a surprise. I never know exactly what dishes I’m shooting ahead of time. I just know food and drinks are going to start flying at me once I get set up, and honestly, that’s part of the fun. I like having to think on my feet. Once I see a dish, I can immediately picture how I want to shoot it.
My Style: Clean, Colorful... but Always Cinematic
No matter what I shoot, my editing style always sneaks back to being cinematic and moody. Now, when you're photographing food for menus or websites, you obviously want it clean, colorful, and true-to-life. Customers need to see exactly what they’re getting. So, I always make sure to deliver those traditional, polished food images.

That said, I always make sure to take a few photos to edit just for myself. The ones that turn a simple plate of food into something more. I don't just want people to see a burger or a cocktail. I want them to feel like they're sitting there, about to take a bite. I really want to show that experience, and most importantly get those “fire” pics for the gram.

For me, it's always a balance between delivering clear, clean photos for the client and creating cinematic, marketing-driven images that tell a story.
Things I Always Think About During a Shoot
Natural light is my best friend. If it's available, I'll take it every time. It just makes food look better, fresher, cleaner, and more appetizing. That said, I don't always get perfect lighting, especially if a restaurant is busy or I’m shooting at night. That's where portable lights come in.
For my last shoot, I brought along some key pieces:
The ProMaster UltraSoft US1014RGB LED Light: Super lightweight, packs into its own case, and easy to set up fast. I used it as a fill light when the sun started moving on me, helping brighten up the shadows without being bulky and in the way.
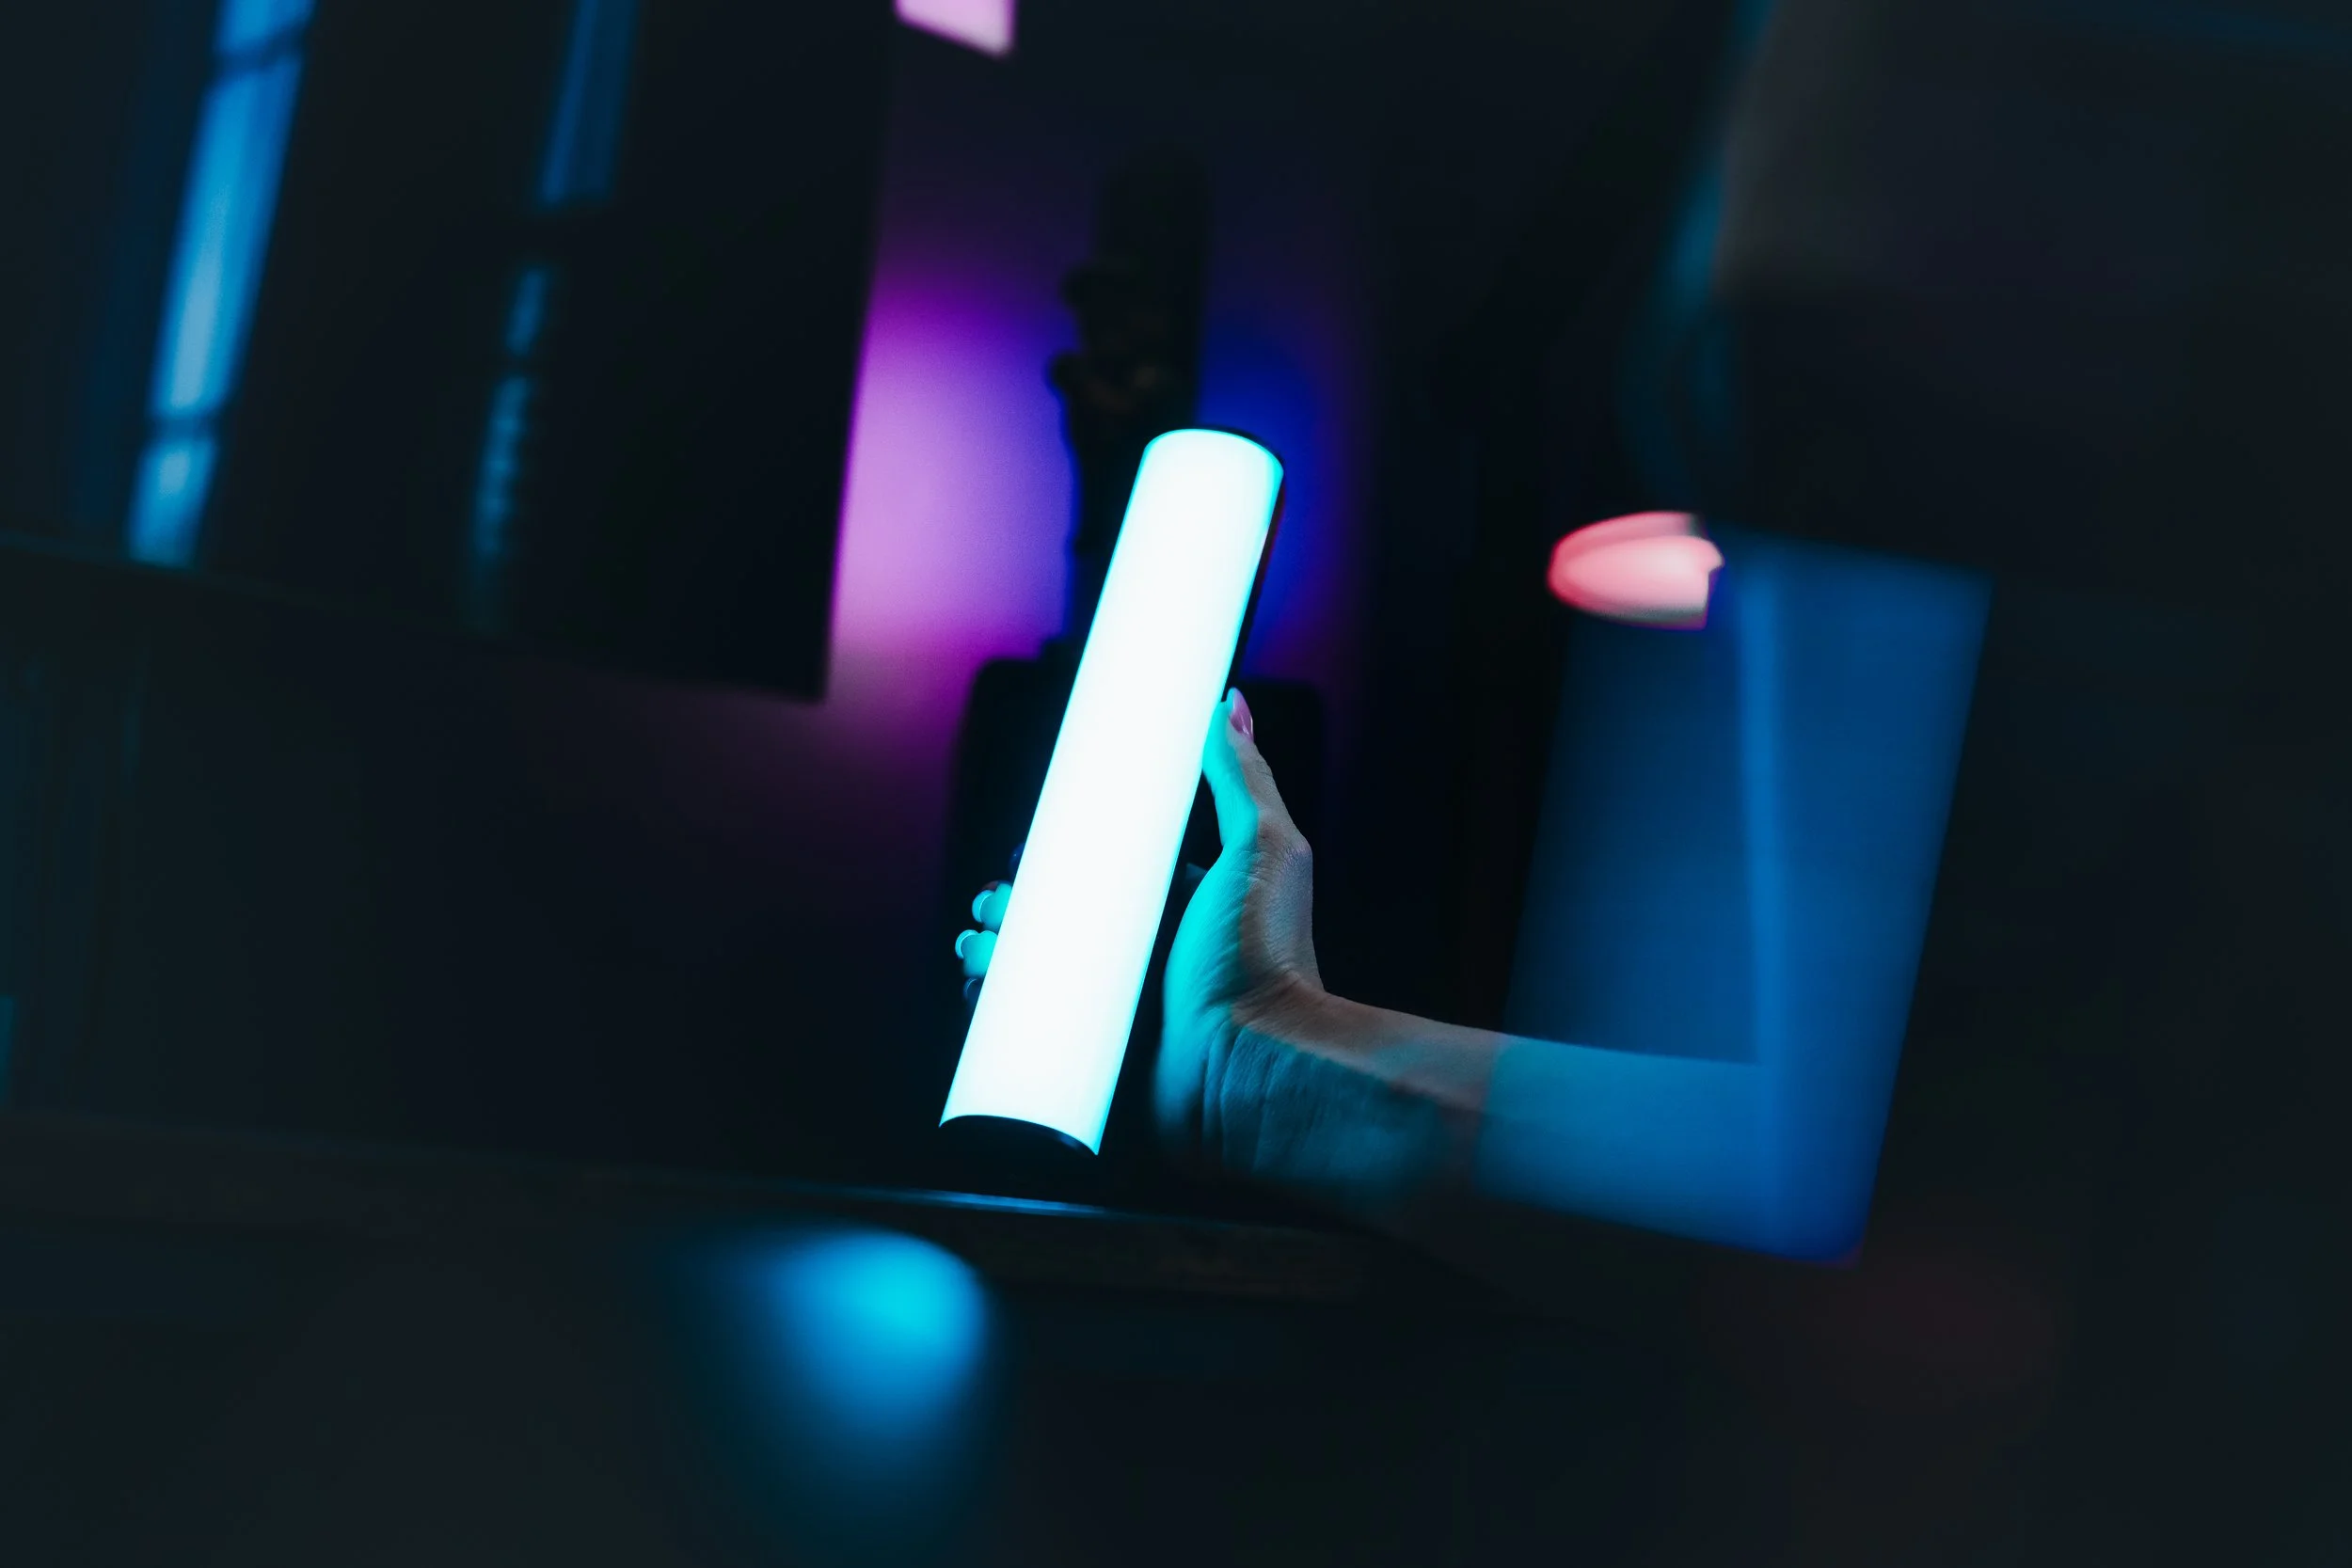
The ProMaster Chroma Tube Lights: Absolute lifesavers for drinks. I could match the color of the light to the drink to make it pop. It made the cocktails glow without making them look fake.
One thing that really surprised me? The Chroma light tubes have internal batteries, so no constantly swapping batteries. They lasted the entire shoot using them off and on.
Having these lightweight, easy-to-move lights made it easy to jump between shooting inside and outside depending on what I wanted to do with the dish.
My Core Setup: Sony a1 + Tamron 35-150mm
I recently upgraded from my Sony a7iii to the Sony a1, and it’s been amazing to say the least. There was nothing wrong with the a7iii, but I started to outgrow it, especially with the way I shoot. I love making a mess. Throwing sauces, freezing cocktails midair, and I need my shots locked in sharp every time.
Every time I go on a shoot at Coughlin’s Law, a restaurant I work with a lot, I always ask, "What can I throw around today?" Most if not all of the food pictures in this blog have been taken there.
The Sony a1’s ability to shoot up to 30 frames per second with insane autofocus lets me capture every messy detail without missing a beat. Paired with the Tamron 35-150mm F2-2.8, it's the perfect setup. The lens covers everything I need, from tight food shots to wider table scenes, without ever having to think about it. It just works. It’s fast (f/2-2.8 lets in a ton of light) It’s razor sharp and it gives me flexibility to shoot tight food shots and wider table setups without swapping glass every two minutes.

When I pack for a shoot, it’s usually my a1, the 35-150mm, sometimes the Tamron 17-28mm F2.8 for ultra-wides, my UltraSoft light, and a tripod. Travel light, work fast, get great results.
The Tripod I Didn't Know I Needed
Speaking of tripods, I brought the ProMaster Chronicle Carbon Fiber Tripod Kit to this last shoot, and it honestly shocked me. Right out of the box, which looks like something Apple would design, you can tell it's premium. The legs feel hydraulic smooth. It's insanely light, around 4lbs, folds up small, and extends over 59 inches. The center column can pop out and become a mini tripod perfect for bar tops and small setups. It's the first tripod I’ve used where form and function actually make sense.

Storage That Keeps Up with Me
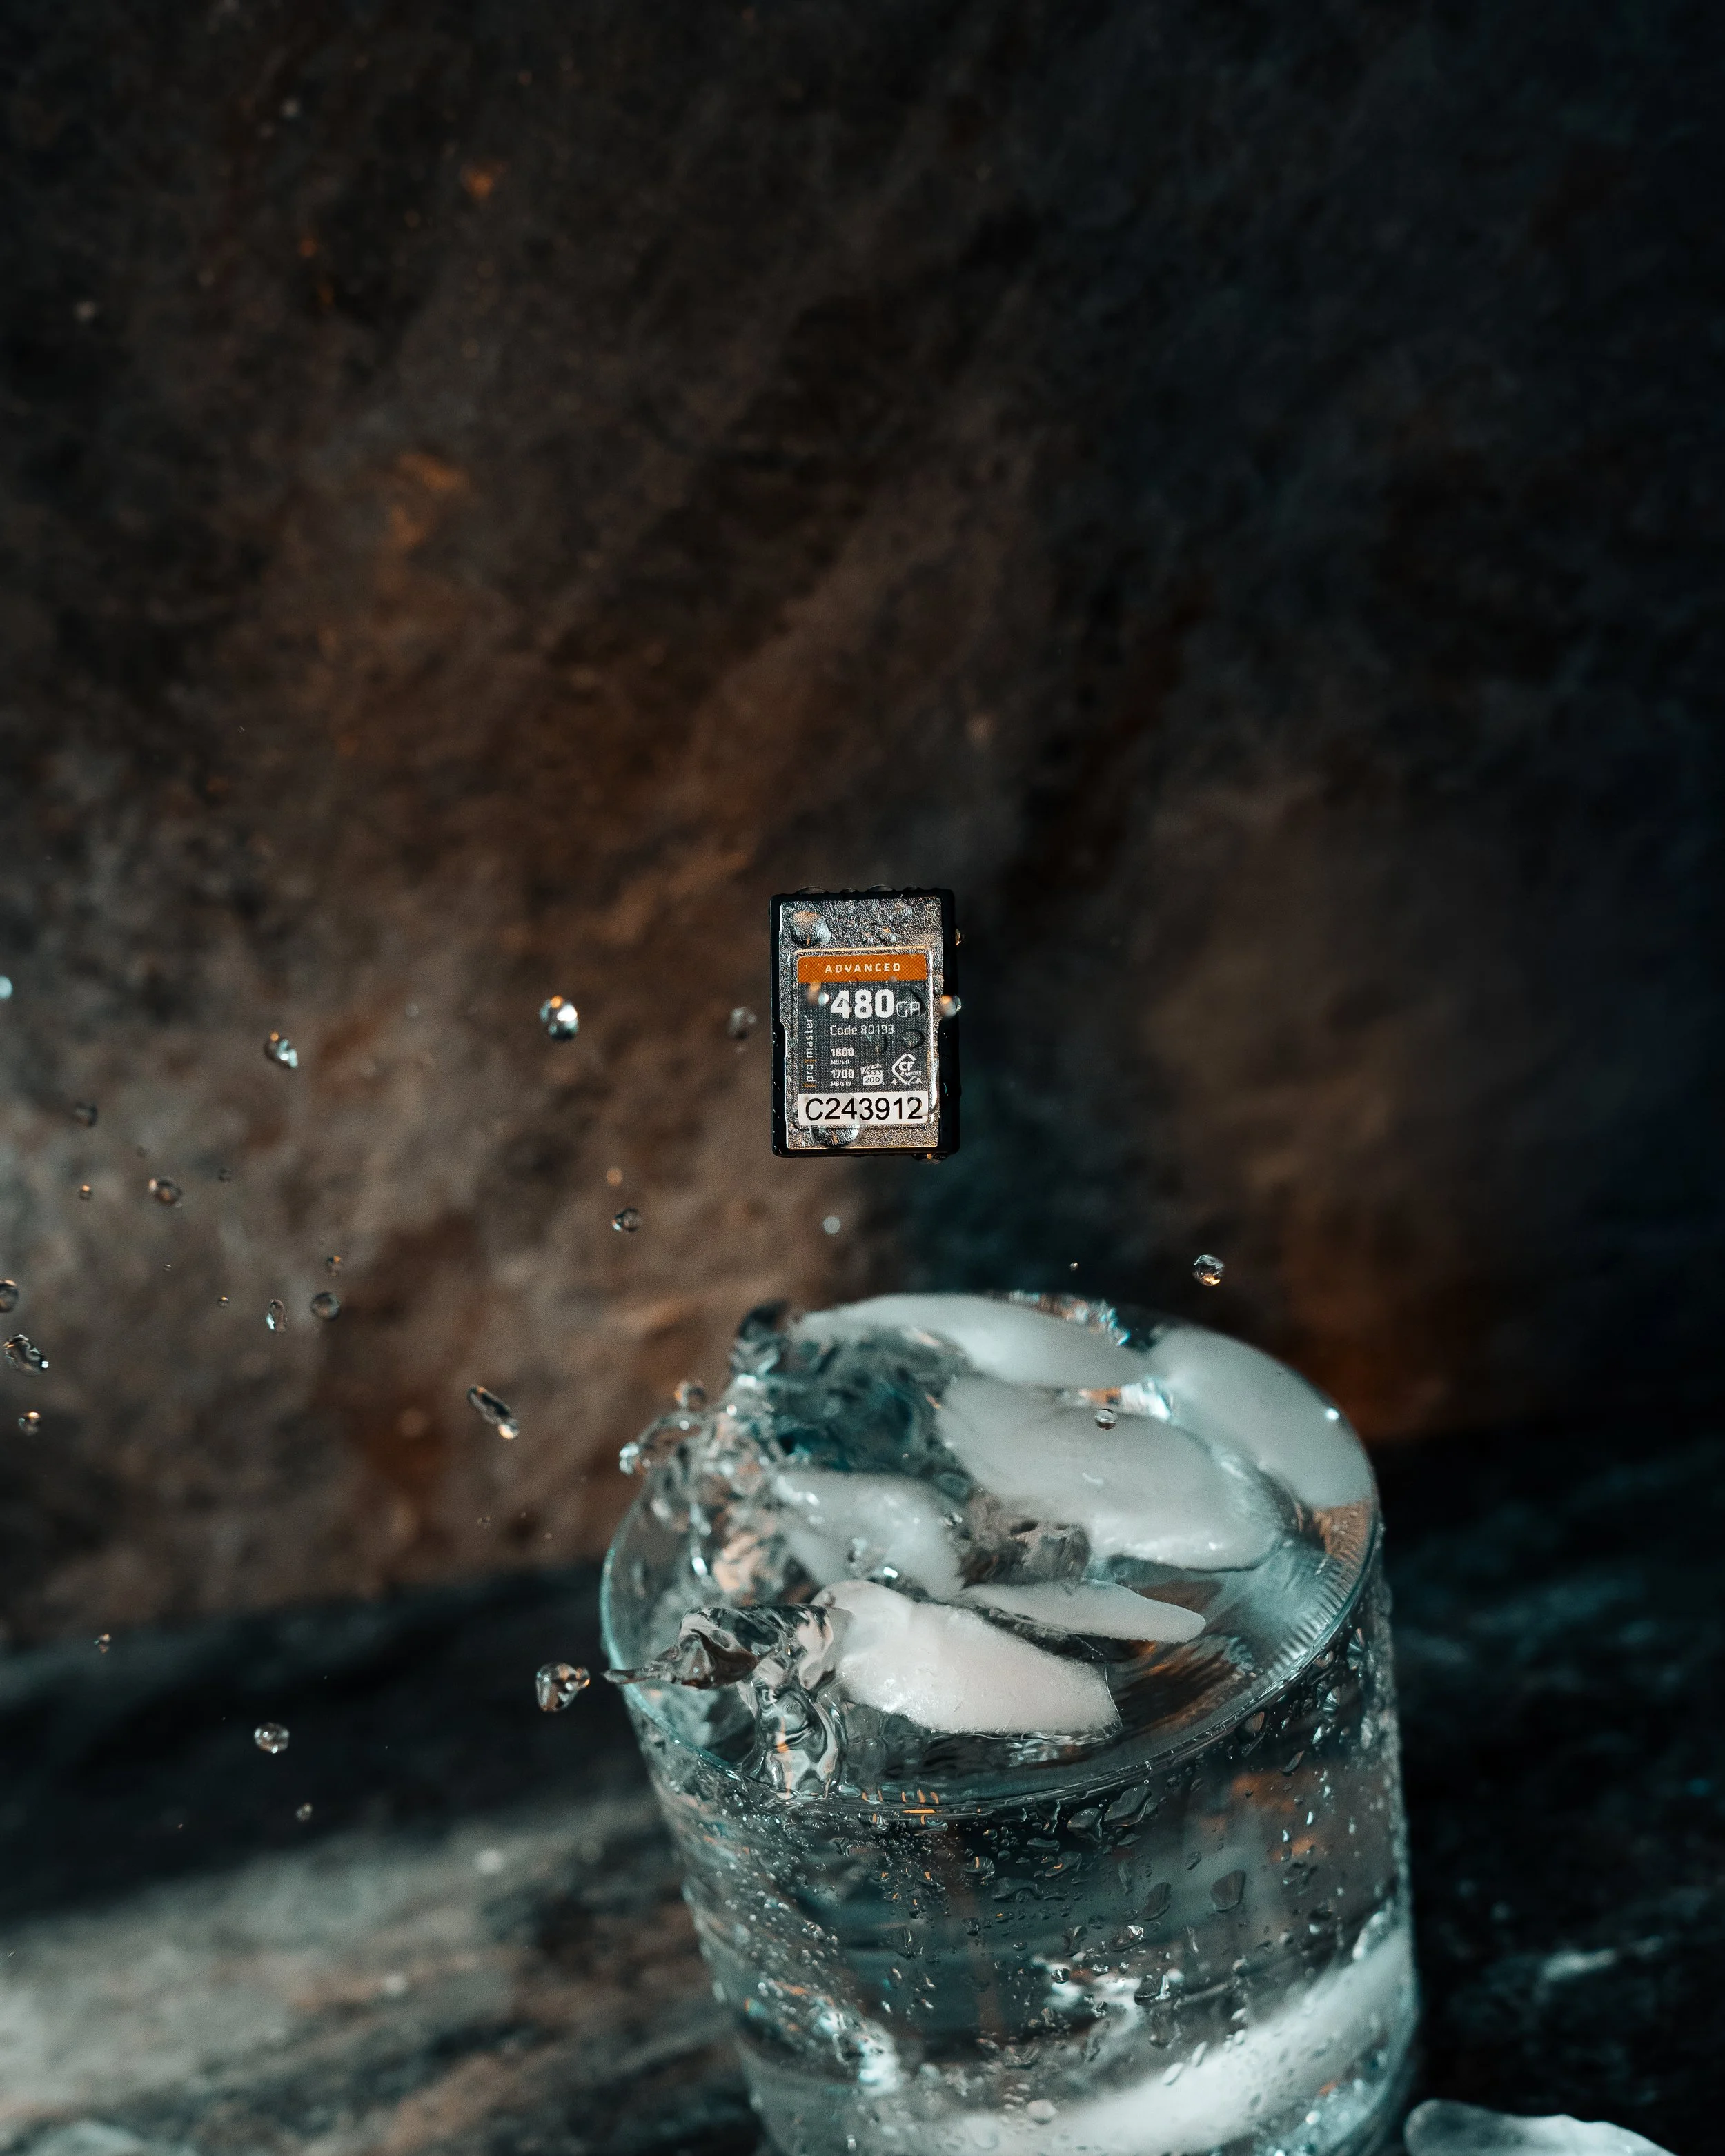
Switching to the ProMaster CFExpress 4.0 Type A 480GB Memory Card was another huge upgrade. When you’re shooting on HI+ burst mode on the a1, you can burn through 20 giant files in seconds and this card just keeps eating them. I honestly don’t even remember what the word "buffer" means anymore. After my last shoot, I imported around 1200 photos into Lightroom before I even finished putting my bag down. That's how fast it is. The faster the card, the faster the import, the faster the editing, and the more time I get to focus on the creative side.
My Editing Process
Editing is actually my favorite part. Since a lot of dishes will be shot under similar lighting setups, I usually find a "golden edit". That one photo where the colors, contrast, and lighting are just right, then I can build everything around it.

If a dish has a lot of vibrant ingredients, I'll dive into the color sliders, bumping up luminance and saturation in just the right places to make it pop. I also take mental notes as I go through, spotting little things I’ll fix later in Photoshop. Sometimes it's a fingerprint, a weirdly placed piece of lettuce, or a sesame seed. Yes, I've zoomed in at 300% to remove a single sesame seed no one else would have noticed, but hey, I know it’s gone and that's all that matters.
Final Thoughts for Beginners
If you’re thinking about getting into food photography, don’t let the gear overwhelm you. I got my start on Instagram around 2012, just taking random photos of my food. No fancy setups, no $1,000 lights, just a phone and whatever table I was sitting at.
A lot of people, especially beginners, get intimidated when they see those crazy high-end food shoots, full studios, food stylists, five lights, and sometimes even fake food. They’ll use mashed potatoes instead of ice cream, so it doesn’t melt, motor oil instead of syrup, and even glue instead of milk. Wild, right? But you don’t need any of that to create amazing food photos.
Over time, my passion grew. I actually fell in love with editing first and shooting second. Honestly, I once shot an entire pizza menu in a storage closet sitting on a trash can, using a deep freezer as my table with nothing but my camera and the Tamron 35-150mm. You can make it work anywhere.

Lighting is the biggest thing you need to learn. Figure that out, and you can shoot food just about anywhere, with just about anything.

Ian Jones
Ian Jones is a commercial photographer and creative strategist based in Pittsburgh, PA and for the past 10+ years, I’ve been capturing bold, story-driven visuals for brands, agencies, and businesses of all sizes. From food and product photography to on-set production stills and campaign content, I create imagery that doesn’t just look good it performs.
Follow Ian Jones on Instagram!


