

How To Clean Tripod After Saltwater Exposure
Saltwater is an amazing place to capture everything from surfers, seascapes, aquatic life, and family trips to the beach. A tripod comes in handy when contesting with waves and other elements in the water. As great as it can be for a photography setting, saltwater and sand can be corrosive and potentially damaging to even the most rugged equipment, including your trusty tripod. ProMaster’s wide array of tripods can handle any shoot you take them on, but still need to be properly maintained. After exposing your tripod to saltwater and sand, you’ll need to give it a deep clean. We break down how to clean your tripod after shooting in saltwater.

Protect Your Tripod at the Shoot
Onsite you can prepare your tripod to shoot in saltwater. If you know you’re going to be submerging the tripod legs in water, wrap the legs in plastic sleeves, securing them with tape or rubber bands. When you’re done shooting, you can easily remove the plastic sleeves. In any case, make sure to rinse your tripod legs with clean water before collapsing to make the deep clean back home that much easier.
What You Need to Clean Your Tripod
A mild cleaning solution
Warm water
Soft brush or toothbrush
Soft sponge
Silicone-based lubricant
Tools to dismantle your tripod (screwdrivers, socket wrench)
Steps to Clean Your Tripod
When you get back, don’t wait to clean your tripod. When dirt and sand settles into the grooves of your tripod it becomes much harder to clean. Unpack your tripod and take the time to fully extend all legs, untwist locks, and create space to clean every inch.
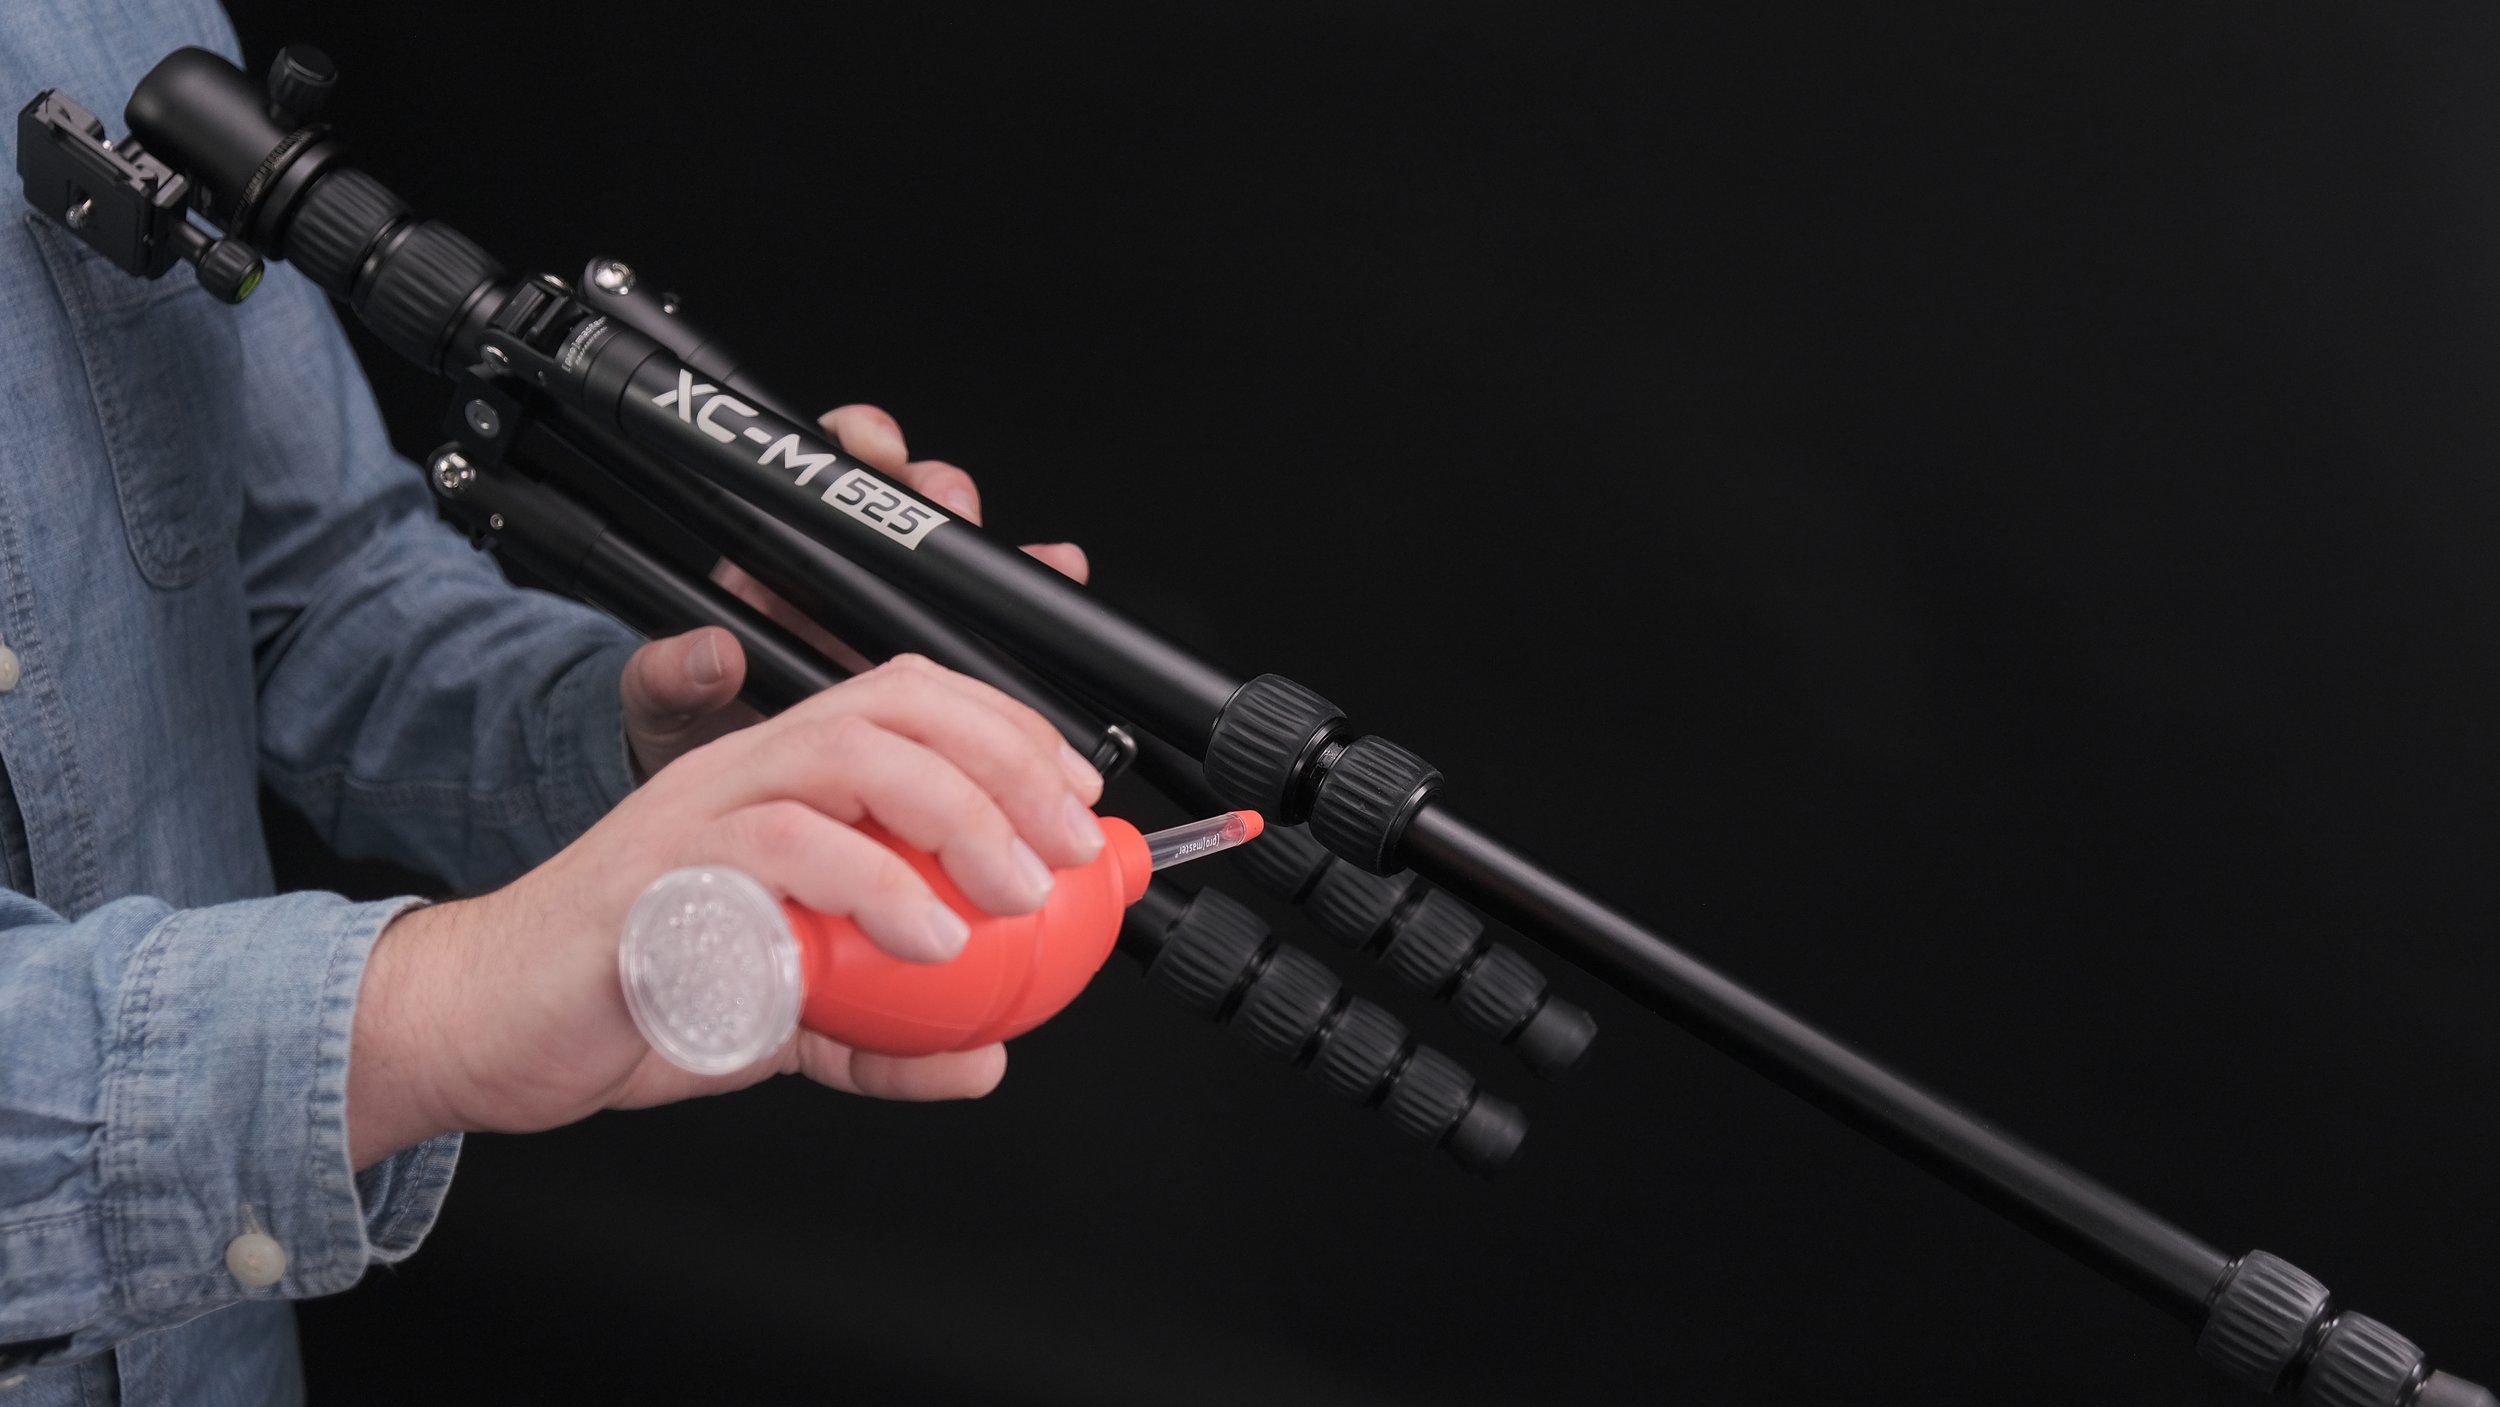
1. Use the clean air filtered blower to blow off any sand sticking on to the parts of the tripod. Pour clean warm water on your tripod. If salt water and any sand sticking to it dries, it could deposit salt and grime on the tripod legs, head, and in smaller parts like screws and locks, making it much harder to clean.

2. Disassemble your tripod. If you have a ProMaster tripod, you can access the owner manual online. Pull out each part of the legs including the feet, center column, flip or twist locks, screws, and other parts. We suggest taking pictures of the process for reference when you assemble.
3. Clean the joints, locks, and screws with a soft brush and mild cleaner. Then rinse thoroughly with clean warm water. Do not scrub the threads, instead run the brush along the threads to remove the dirt and sand, then wipe with a dry, soft sponge. After cleaning all tripod parts, wipe them dry with a clean soft cloth.

4. After your tripod has dried, you will need to lubricate your tripod in order for it to work smoothly. Apply a silicone-based lubricant to the joints, threads, locks, and parts of the tripod that need lubricating and gently wipe off any excess lubricant with a microfiber cloth.
5. Reassemble your tripod, making sure all legs, rings, and bolts are put back together in the correct order. Look for any notches and arrows that indicate how parts need to be put together.
Conclusion
Follow these steps to keep your tripod in its best condition, no matter where you shoot. If you frequently shoot outdoors, you may need to thoroughly clean your tripod every 3 to 6 months. Now that you know how to safely prep, store, and clean your tripod when out in the water you can shoot fearlessly and get the shot you want.
ProMaster products are guaranteed for one full year against defects in workmanship and materials. If at any time after one year, your ProMaster product fails under normal use, we invite you to return it to ProMaster for evaluation. Find out more about our warranties and contact us online.


